Ceiling Beam
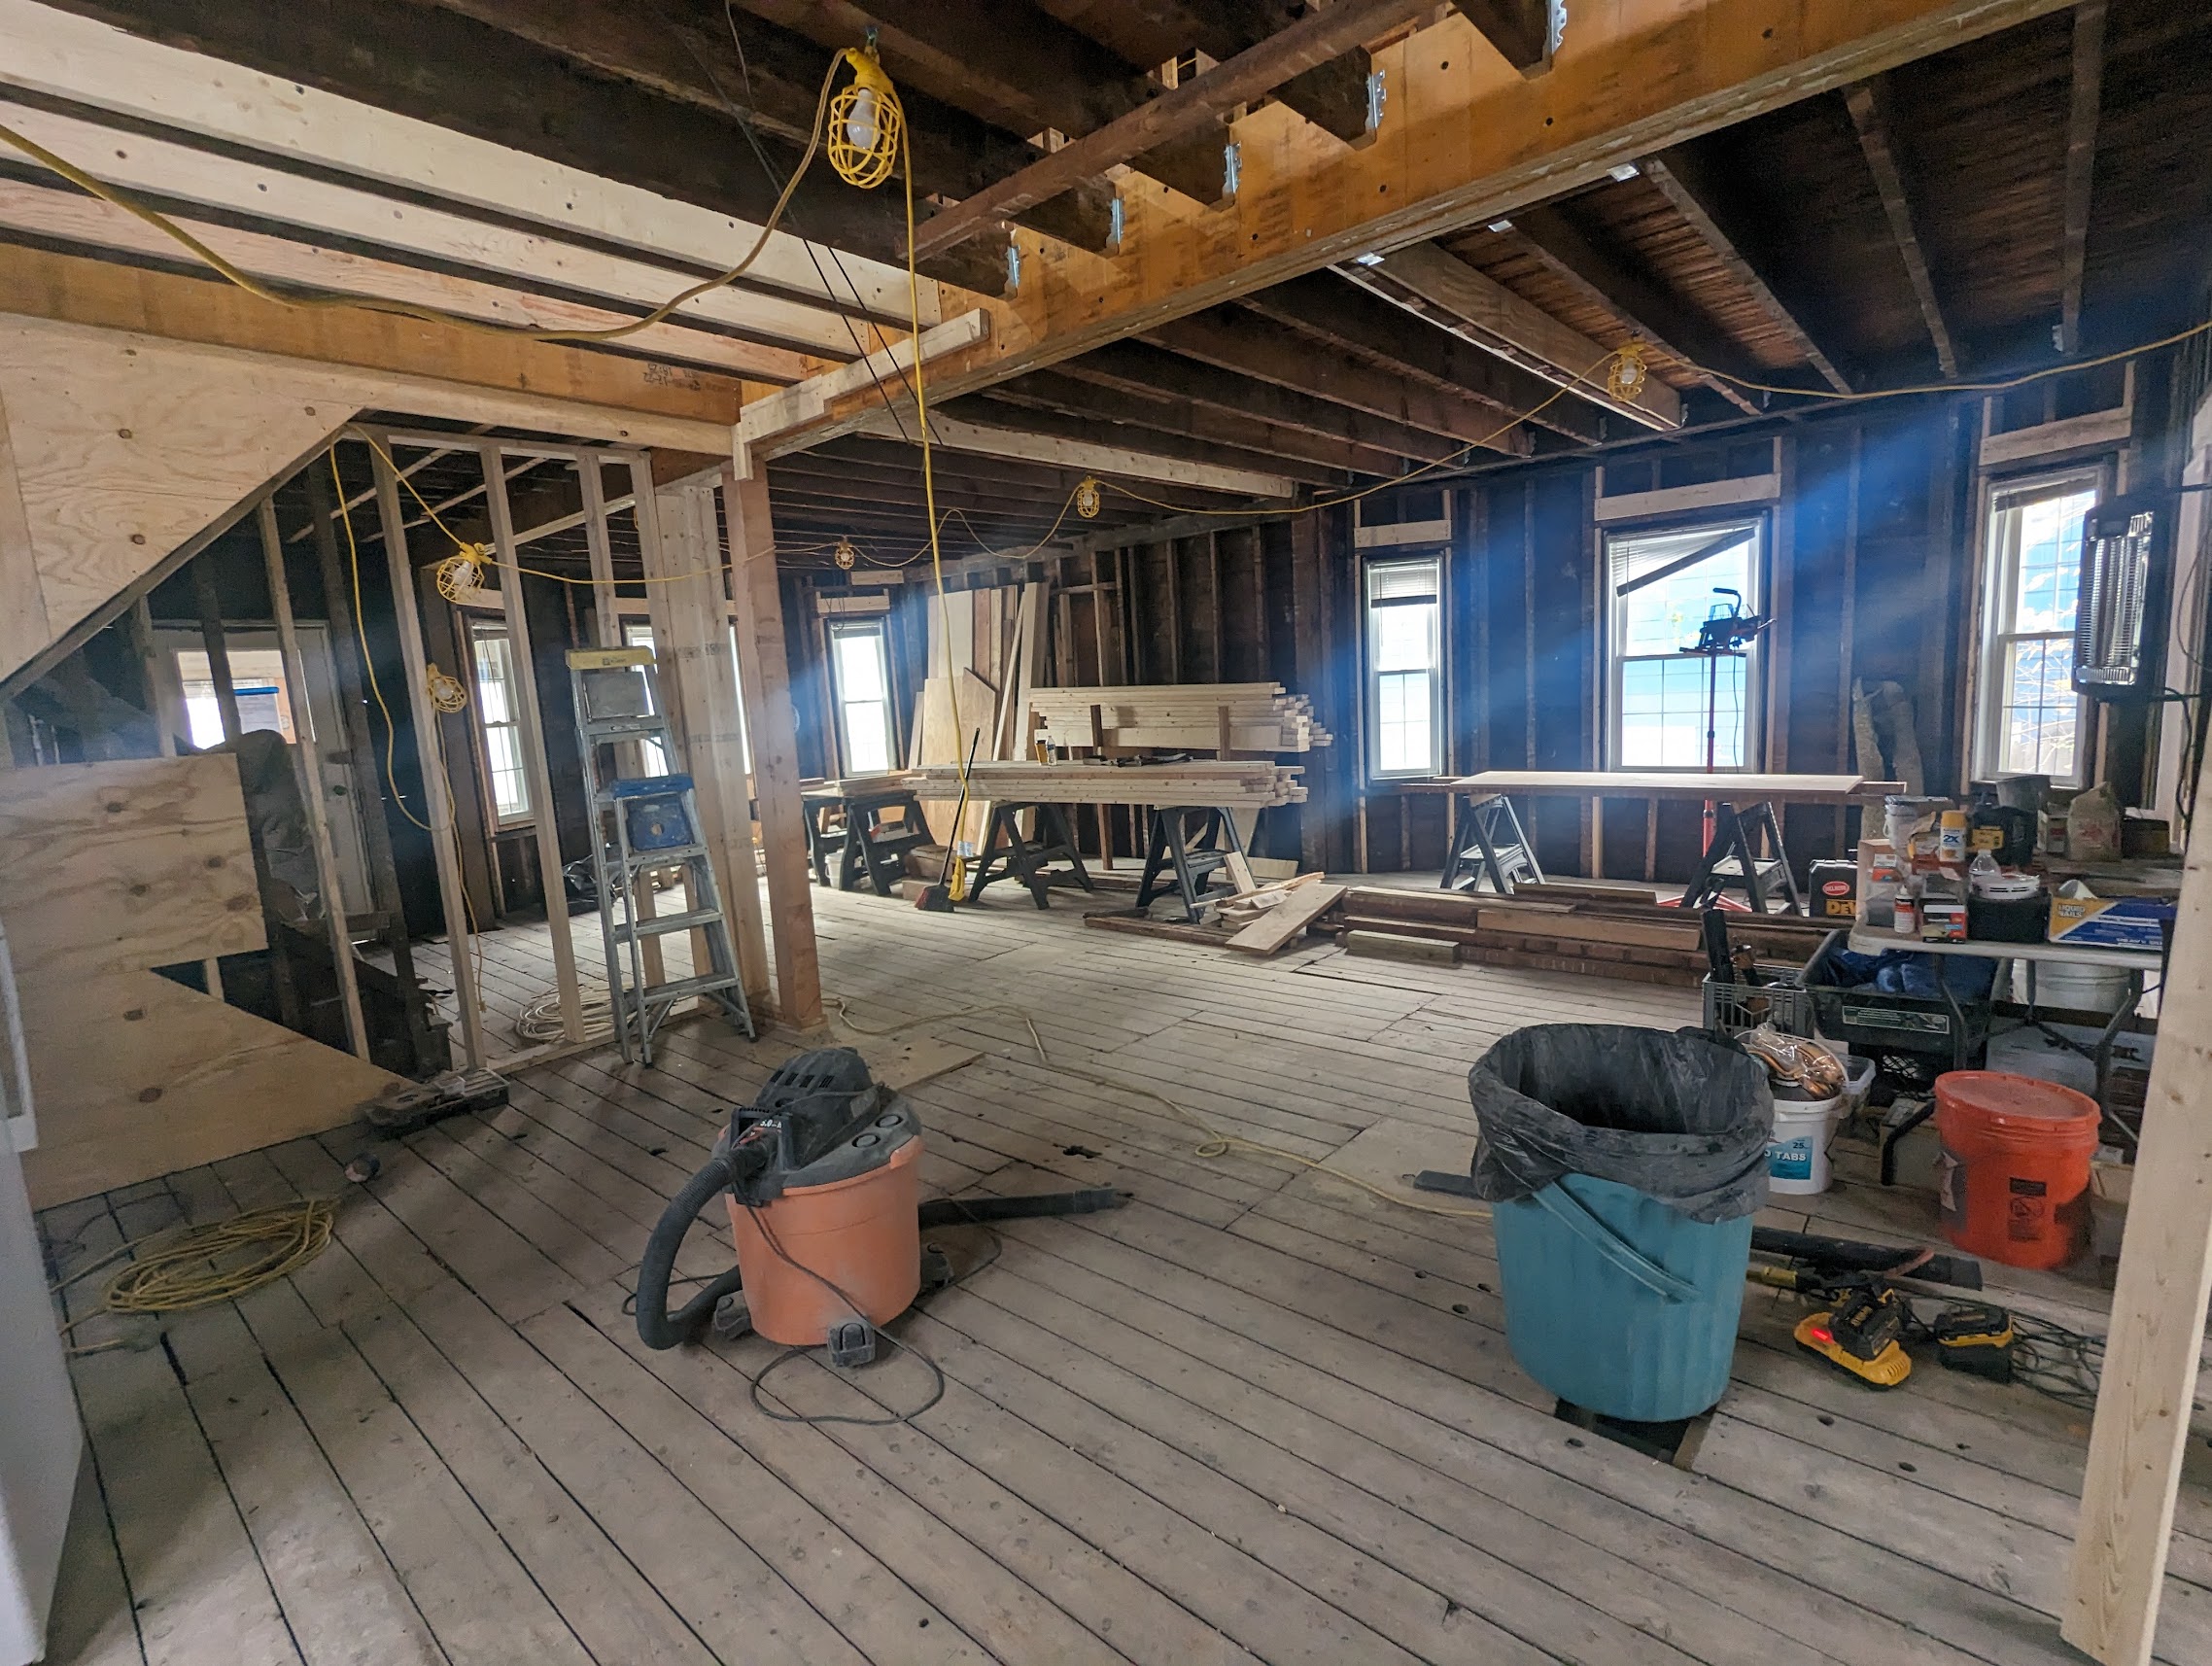
In perhaps the most dramatic element of the renovation, we’ve removed the interior walls on the first floor and installed a beam to support the second floor.
The beams themselves are interesting. Like plywood, they’re made out of thin sheets of wood glued together. Plywood usually has its sheets oriented in alternating directions, which makes it strong in both directions. The beams, on the other hand, have all of their sheets oriented in the same direction. This makes the beams really strong in that direction - here’s a frankly terrifying video of people with far too little PPE putting a lot of weight on a scrawny beam:
A LVL of a given size might be able to handle three times the load of the same sized solid wood beam, and might cause 3-5 times as much. Given that we’ve got three 14"x2" (approx) LVLs laminated together, we’d need an enormous solid wood beam to fill this space.
The lumber industry likes these beams, too. It lets them use wood from trees that are too small to mill into solid wood beams. Not every tree can give you a 20 foot 2x12.

The main beam is actually split in two, supported by the column in the middle of the house. This means our longest beam is about 17 feet long; beyond that we would have needed an even larger beam.
The next step up from an LVL would be a steel beam. You see those a lot in industrial and commercial spaces that need longer spans. Installing steel beams requires welders, ironworkers, and much more equipment.
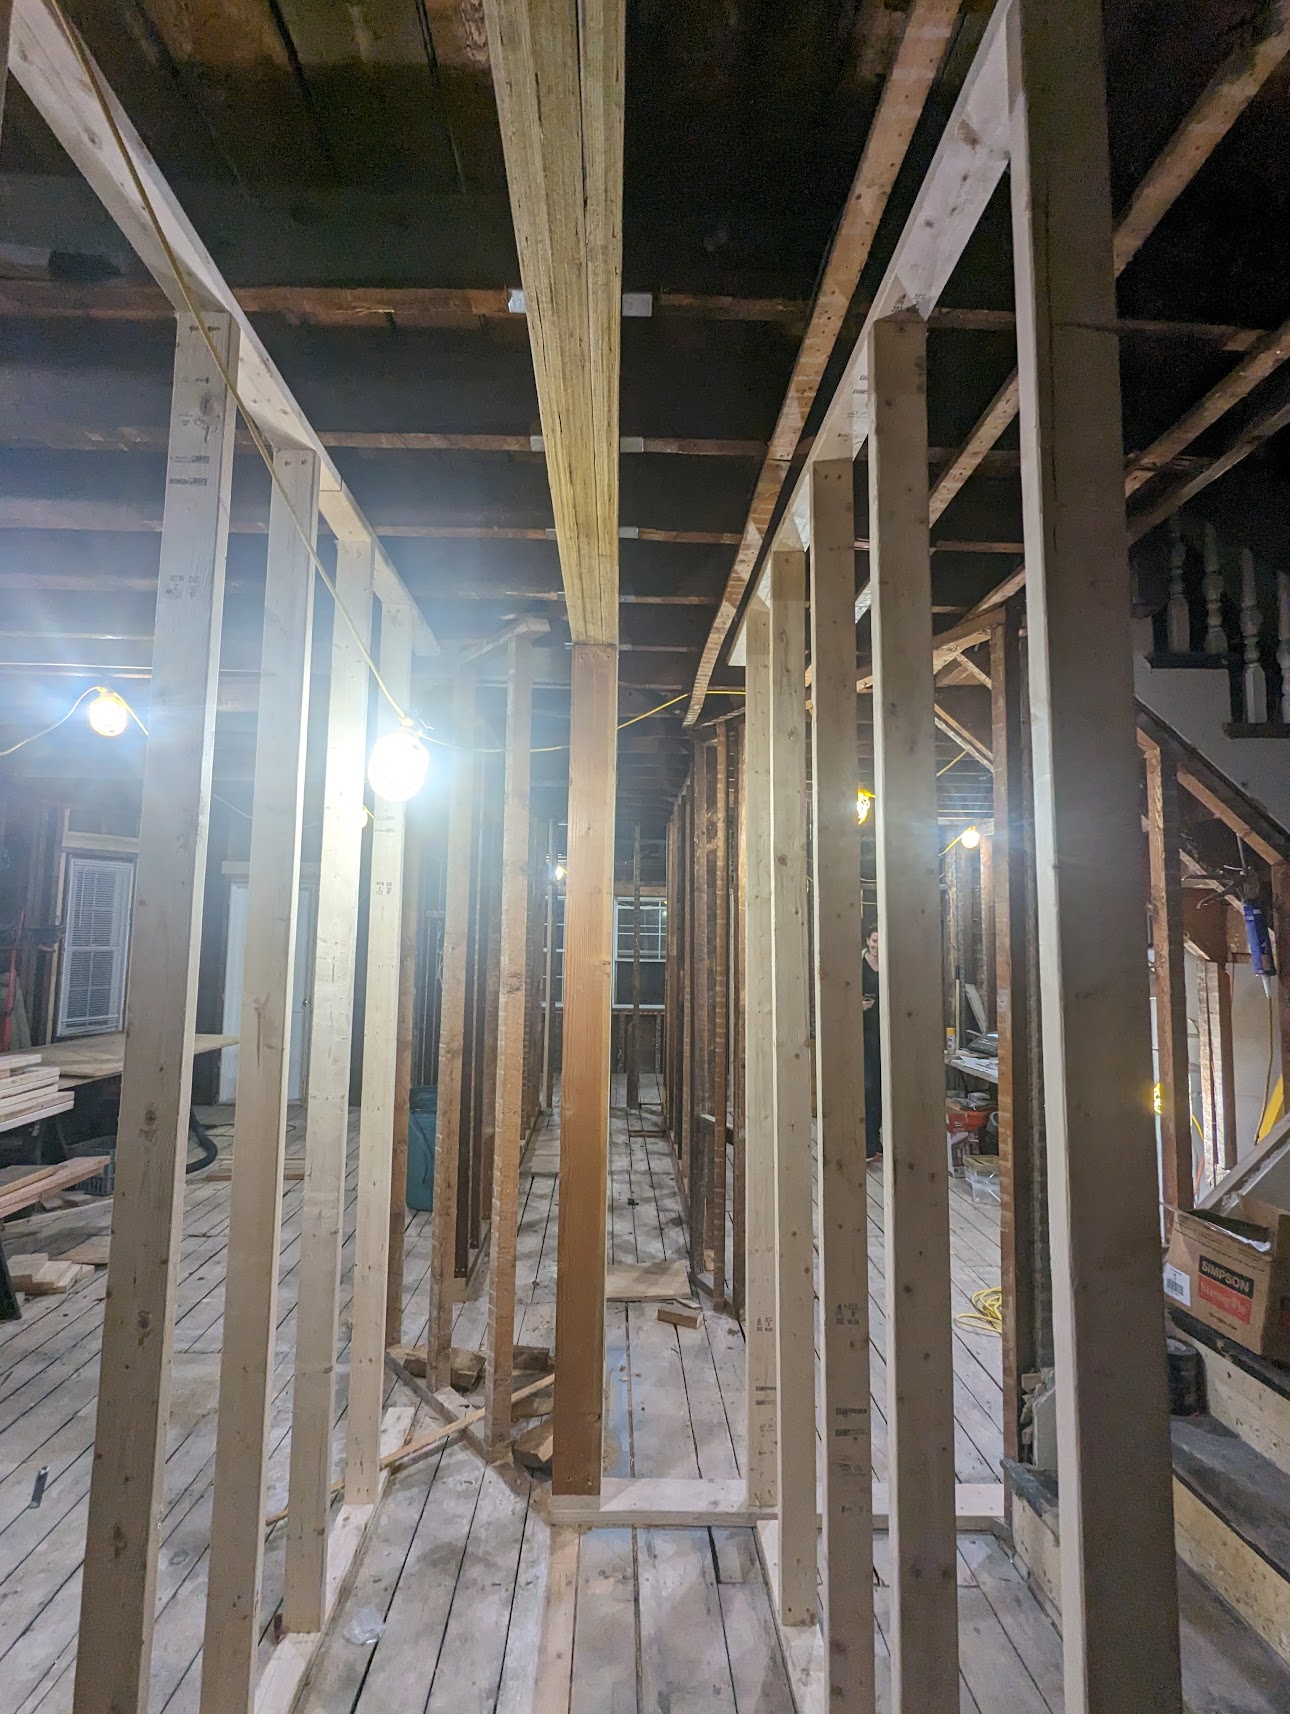
That’s not to say that installing the LVL was easy. The carpenter first built temporary walls on either side of the wall we were removing:

Then, they removed the wall and got the beam in place:
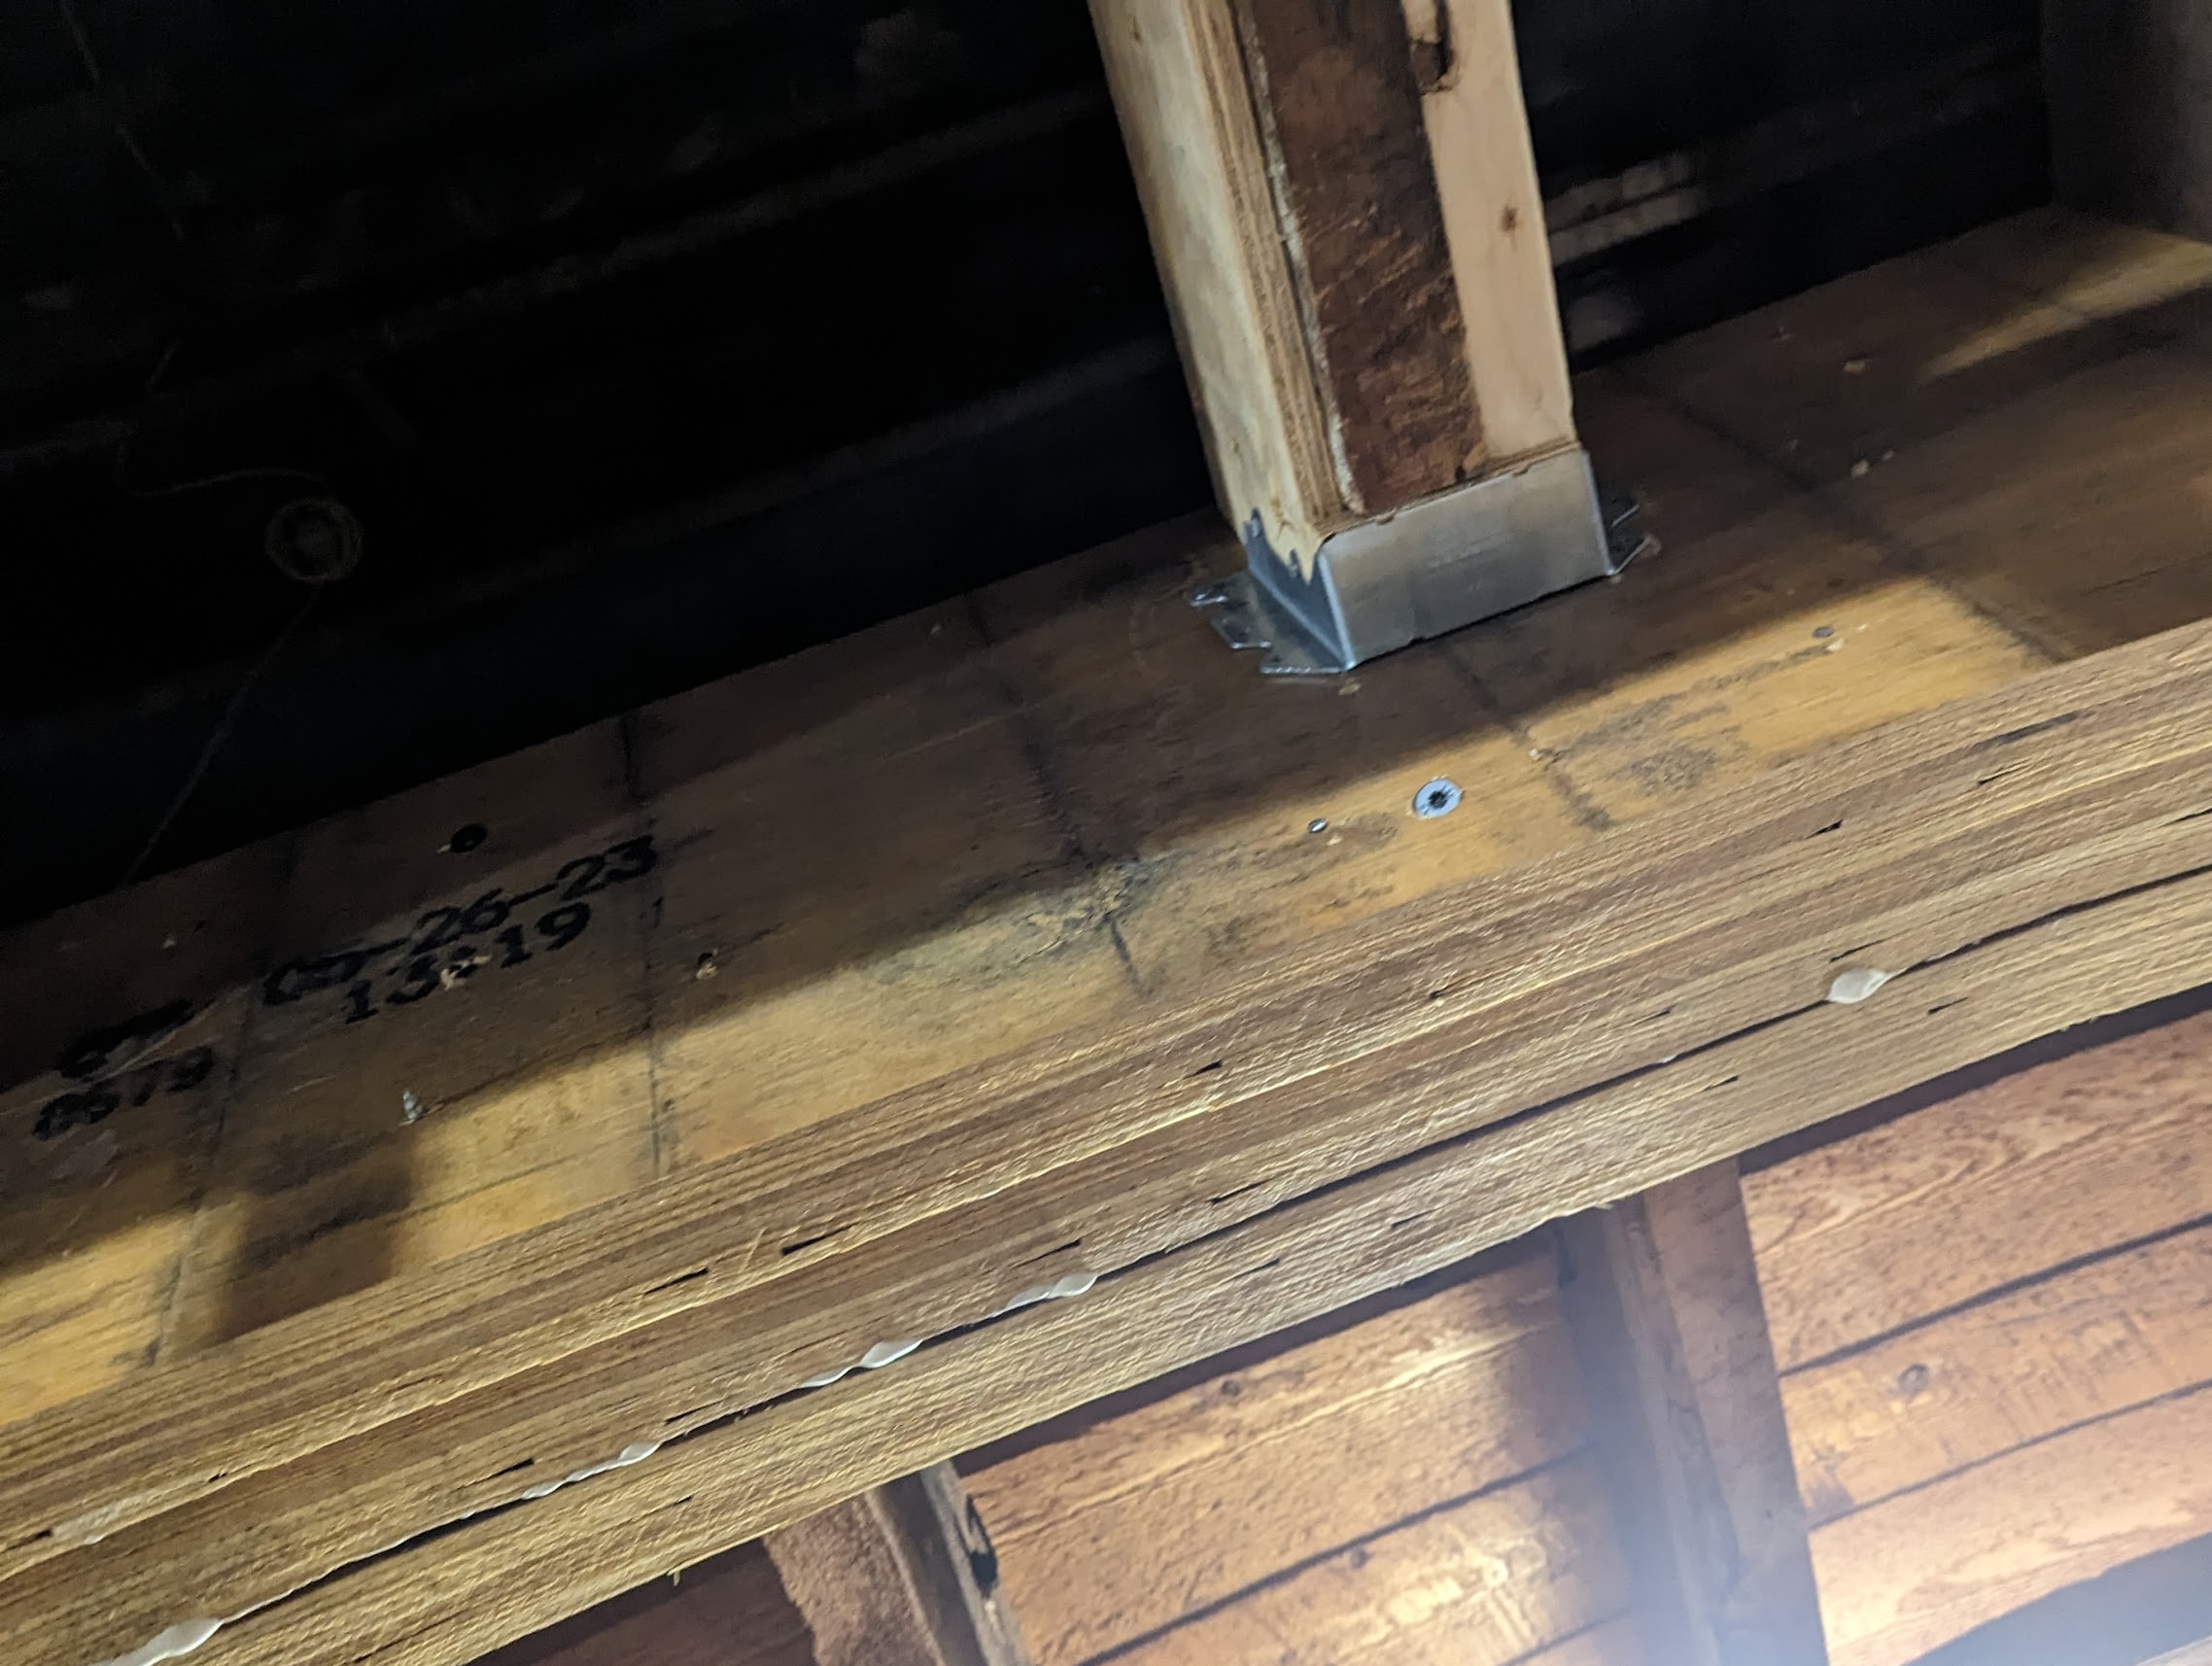
They could have put the beam under the floor joists, but then we would have had a 14" dip in the ceiling going into the kitchen. Instead, they trimmed each joist and used joist hangers to attach them to the beam. It’s easiest to see this from above - without joist hangers:
 and after installing joist hangers:

They could install this part of the beam more easily because the upstairs floor was removed; they had to work from below for other parts of the beam.
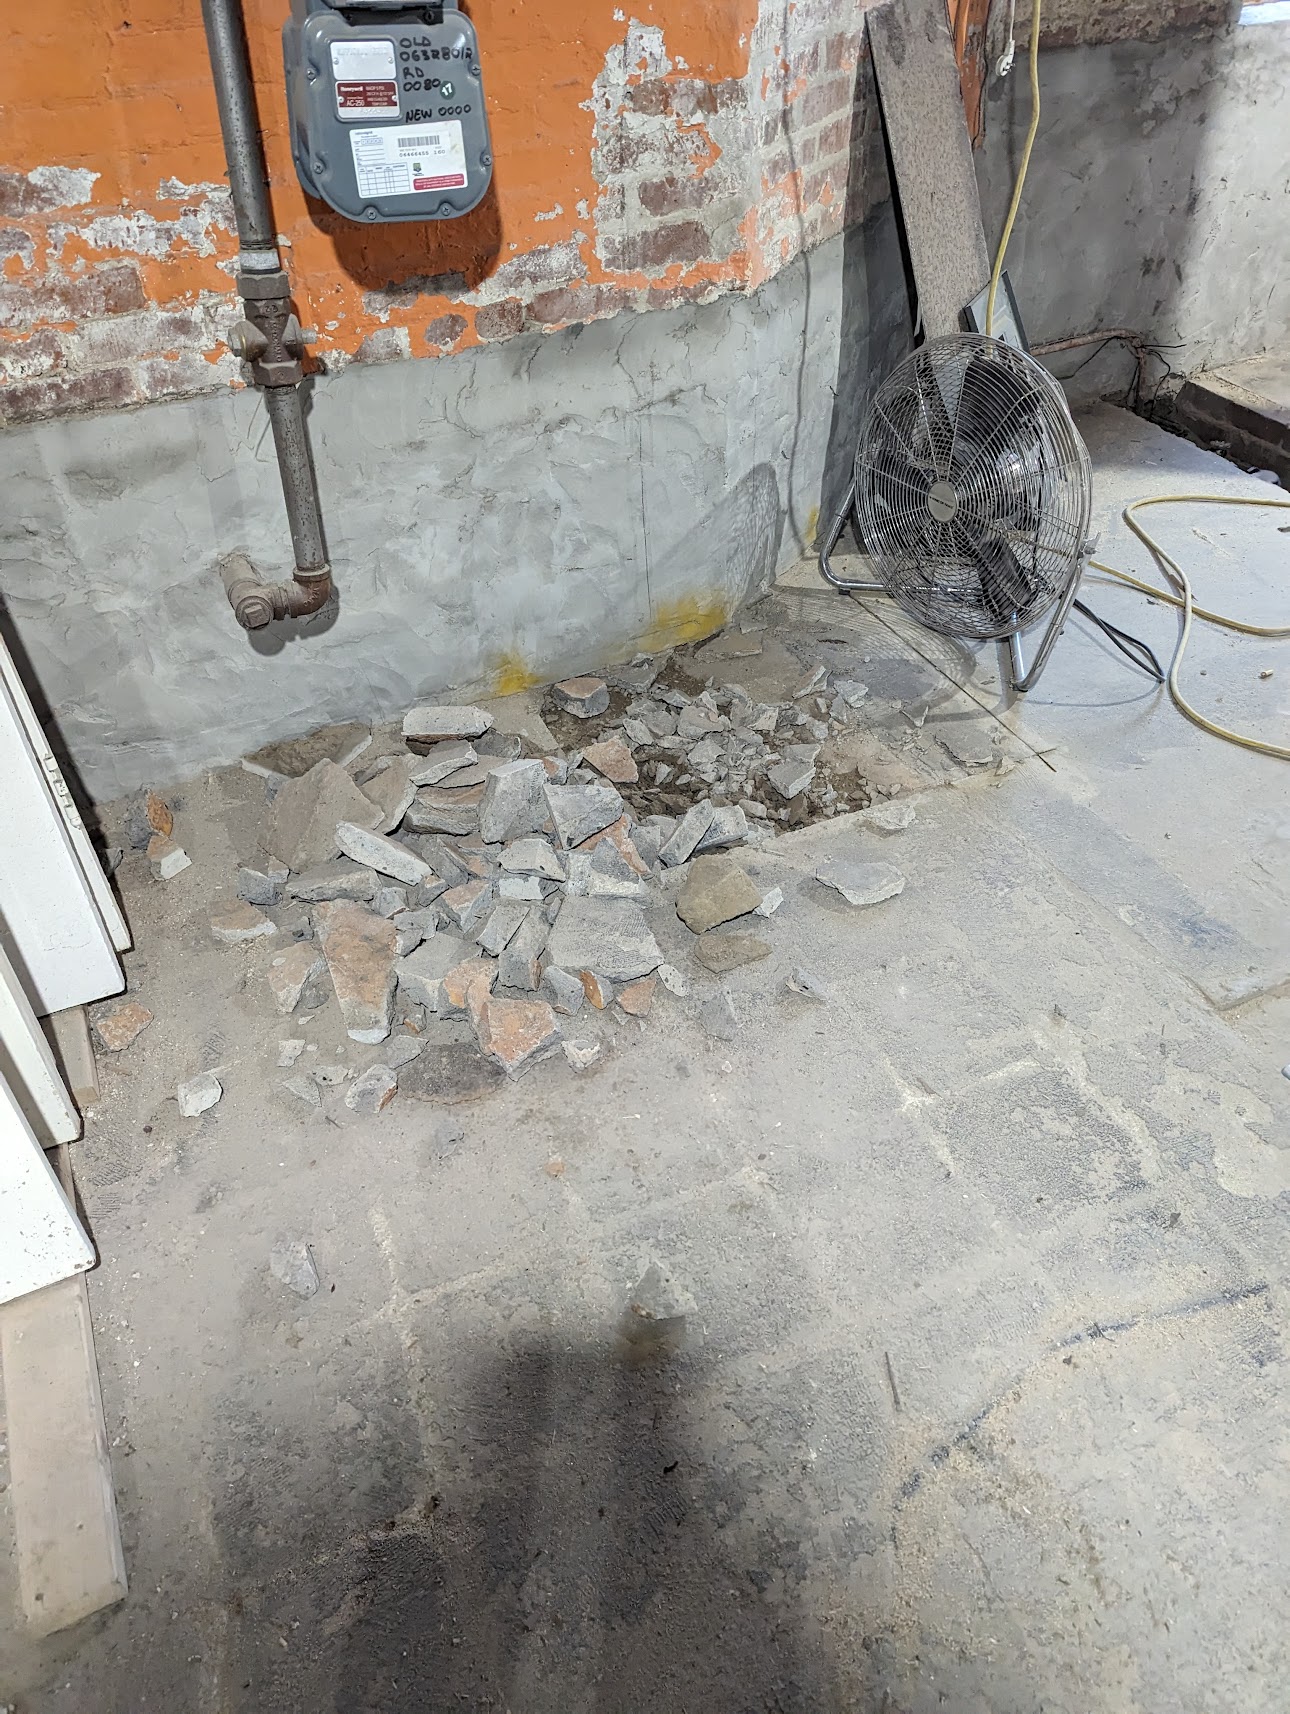
The last step (not done yet) is to install posts in the basement under the posts on the first floor. This transfers the forces to the foundation and prevents the first floor from sagging. They’ve torn up the parts of the basement where these footings go; they will pour concrete footings here.